<img height="1" width="1" style="display:none" src="https://www.facebook.com/tr?id=262721675103356&amp;ev=PageView&amp;noscript=1">

4 min read

How to customize the Magento Admin site (part 1)

Every Magento instance consits of at least two seperate sites: the frontend, which allows customers to navigate, create accounts and purchase goods, and the admin site: which provides a secure platform for the commerce's administrators to perform tasks such as order management, catalog updates, content creation, marketing campaings, generating reports and configuring all the settings for the store, amongst other ations.

There is usually a large effort placed to develop and customize the frontend, which is clearly important, since it's where all of the customers will navigate, however, far too often the admin site gets overlooked, sometimes without even knowing that it's entirely possible to customize and modify the Magento admin site down to the last pixel.

Some benefits of customizing the admin site are:

  • Greater personalization for the merchant: include their logos, icons and colors in the admin site, to provide a clear company image and branding throughout the entire Magento platform, which will also give your admin site a more professional look and feel, which will allow you to better showcase it to stakeholders, inverstors and business associates.
  • Show what you want, no more, no less: Magento has tons of functionalities out of the box, especially if you're using the Adobe Commerce version, but sometimes less is more. Having so many tools and sections can be confusing for a user that only needs to perform a few tasks, and while ACLs (Access Control Lists) exist to create rules for users that allow them to access only particular sections, maybe an extension you have added to your site doesn't have this configuration, or maybe you don't want any user to see a particular section in the menu. Well its as simple as modifying the menu template to add, remove or modify any menu item in the admin site.
  • No ambiguity: the users of the admin site will know for sure their in the right place, after all, some people might have to interact with several magento instances (such as developers, contractors and part-time workers). By having your admin customized to match your commerce's branding, it makes it obvious that your in the right place.
  • Let creativity flourish: while this may not apply to everyone, some might say that the default Magento admin site looks a bit... bland. This is of course, intentional, as it must be able to function for any type of business and industry, therefore, vanilla is the flavor for the task. But it doesn't have to be this way, maybe you want your employees to feel like they are using an exiting, creative and top-notch platform when they enter the admin, its up to you, after all, as you will see in this article, it doesn't take a lot of work to give your admin site some improvement.


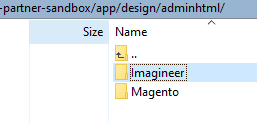
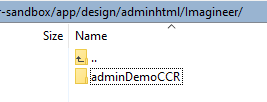
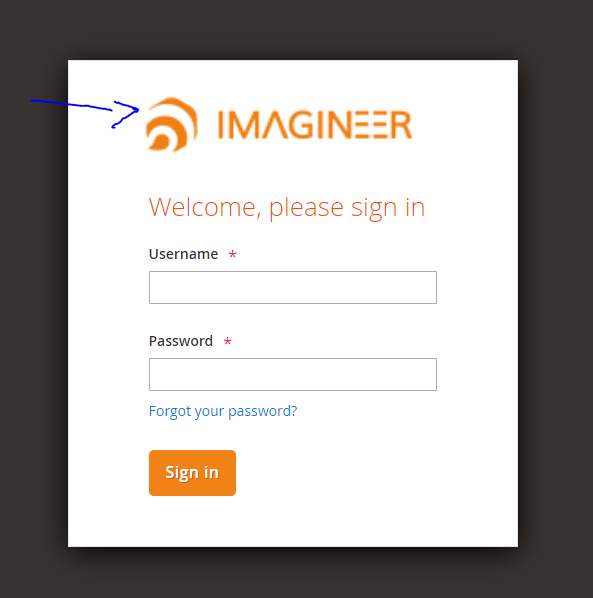
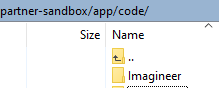
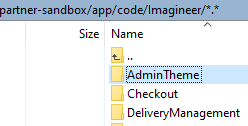
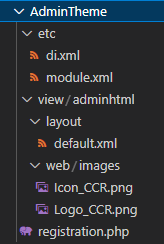
To modify your admin site, you'll have to create a theme and a module, and while this will require some basic coding, you can just use the code provided, but be sure to replace the vendor's name to yours. 

Here is how it's done:

  1. In your magento root folder (where you'll find the app, pub, generated, vendor and var directories), navigate to app/design/adminhtml, here you should see a folder named "Magento", but since we want our theme to be seperate from Magento, we'll create a folder with our vendor's name (in this example, replace "Imagineer" with your company):

    Magento Steps
  2. Inside this folder you created, make another folder, which you can name with whatever name you want to identify your theme with (since you can create an indefinite number of themes, you can be as creative or generic as you want with the nomenclature), here we are using "adminDemoCCR" as our example:

    Magento Steps
  3. Inside this folder, create a file "theme.xml" with the following content:

    <theme xmlns:xsi="http://www.w3.org/2001/XMLSchema-instance" xsi:noNamespaceSchemaLocation="urn:magento:framework:Config/etc/theme.xsd">
        <title>Admin Demo CCR</title
        <!-- ^ your theme's name -->
        <parent>Magento/backend</parent>   
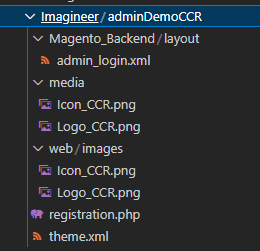
        <!-- ^ the parent theme, in case your theme inherits from an existing theme -->
        <media>
            <preview_image>media/Icon_CCR.png</preview_image>
            <!-- ^ the path to your theme's preview image -->
        </media>
    </theme>
     
  4. Also, create a file "registration.php" to let Magento know that this is a component (replace "Imagineer" with your company and "adminDemoCCR" with your theme's name):

    <?php
    use \Magento\Framework\Component\ComponentRegistrar;

    ComponentRegistrar::register(ComponentRegistrar::THEME, 'adminhtml/Imagineer/adminDemoCCR', __DIR__);
     
  5. Next, create a folder "media", which you can use to upload images, styles and scripts (make sure the name of your Icon matches the <preview_image> defined in step 3):

    Magento Steps
  6. Additionally, you can create a folder "web" and inside it another folder "images", to add all the images you want Magento to load in your admin:

    Magento Steps
  7. To change the image shown in the log in screen, create a folder "Magento_Backend", in which we'll override the default login image. Inside this new folder, create a folder "layout", and a file "admin_login.xml":


    Magento Steps
  8. Add the following content (remember to replace "Logo_CCR.png" with your logo's name):

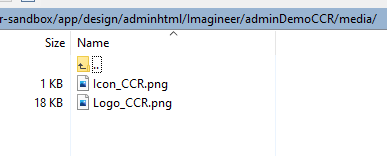
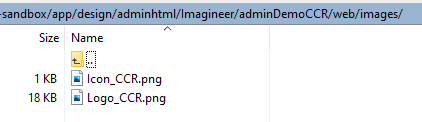
    <page xmlns:xsi="http://www.w3.org/2001/XMLSchema-instance" layout="admin-login" xsi:noNamespaceSchemaLocation="urn:magento:framework:View/Layout/etc/page_configuration.xsd">
        <body>
            <referenceBlock name="logo">
                <arguments>
                    <argument name="logo_image_src" xsi:type="string">images/Logo_CCR.png</argument>
                    <argument name="logo_width" xsi:type="number">150</argument>
                    <!-- ^ Add custom logo width -->
                    <argument name="logo_height" xsi:type="number">80</argument>
                    <!-- ^ Add custom logo height -->
                </arguments>
            </referenceBlock>
        </body>
     </page>
     
    This is the image we are replacing:

    Magento Steps
    Magento Steps

  9. So far, your theme sould have the following structure:

    Magento Steps

  10. Next, to tell magento that it needs to load this theme, you have to create a module, so navigate back to your Magento root directory, and enter the "app" folder, from here, enter the "code" folder (if it doesn't exist, create it), and create a folder with the same vendor name that you defined in step 1 (probably your company name), in our example, it's "Imagineer". If a folder with this name already exists, then just open it:

    Magento Steps

  11. Inside this folder, create a new folder with your module's name, in this example, we call it "AdminTheme" (it's okay if you have multple modules in here, just give it a unique name):

    Magento Steps
  12. Inside this folder, create a file "registration.php" (yes, we created one in step 4, but that was for the theme, here we are creating a separate module that will actually load that theme):
    (repace Imagineer with your company)

    <?php
    \Magento\Framework\Component\ComponentRegistrar::register(
    \Magento\Framework\Component\ComponentRegistrar::MODULE,
       'Imagineer_AdminTheme',
       __DIR__
    );
    ?>
     
  13. Next, create a folder "etc" and inside create a file "module.xml" (again, make sure to repace Imagineer with your company):

    <?xml version="1.0"?>
    <config xmlns:xsi="http://www.w3.org/2001/XMLSchema-instance" xsi:noNamespaceSchemaLocation="urn:magento:framework:Module/etc/module.xsd">
        <module name="Imagineer_AdminTheme" setup_version="1.0">
       <sequence>
          <module name="Magento_Theme"/>
          <module name="Magento_Enterprise"/>
       </sequence>
        </module>
    </config>
     
  14. Inside the "etc" folder, create another file "di.xml" (replace Imagineer/adminDemoCCR with your company and theme names defined in steps 1 and 2):
     
    <config xmlns:xsi="http://www.w3.org/2001/XMLSchema-instance" xsi:noNamespaceSchemaLocation="urn:magento:framework:ObjectManager/etc/config.xsd">
        <!-- Admin theme. Start -->
        <type name="Magento\Theme\Model\View\Design">
            <arguments>
                 <argument name="themes" xsi:type="array">
                     <item name="adminhtml" xsi:type="string">Imagineer/adminDemoCCR</item>
    <!-- Example: "Magento/backend" -->
                 </argument>
             </arguments>
        </type>
        <!-- Admin theme. End -->
    </config>
  15. Now let's add an icon to the side menu of the admin site, to do this, go back to the module's folder (app/code/YourCompany/AdminTheme) and create a folder "view" and inside it a folder "adminhtml", and another folder named "layout". Here, create a new file "default.xml" (remember to replace "Icon_CCR.png" with your icons's name):

    <?xml version="1.0"?>
    <page xmlns:xsi="http://www.w3.org/2001/XMLSchema-instance" layout="admin-1column" xsi:noNamespaceSchemaLocation="urn:magento:framework:View/Layout/etc/page_configuration.xsd">
        <body>
            <referenceContainer name="header">
                <block class="Magento\Backend\Block\Page\Header" name="logo" before="-">
                    <arguments>
                        <argument name="show_part" xsi:type="string">logo</argument>
                        <argument name="logo_image_src" xsi:type="string">images/Icon_CCR.png</argument>
                    </arguments>
                </block>
            </referenceContainer>
        </body>
    </page>

     
    This is the image we are replacing:
    Magento Steps

    Magento Steps

  16. You can also add images in this module, to do so, go back to the view folder created in step 15, and create a folder "web" and inside it a folder "images", where you can upload images for your theme.
  17. So far, your module sould have the following structure:

    Magento Steps

  18. Lastly, we must compile, generate static content and clean cache. To do so, navigate in a terminal to your magento root folder, for example "cd /var/www/html/magento", and run the following commands:
    • bin/magento setup:upgrade
    • bin/magento setup:di:compile
    • bin/magento setup:static-content:deploy -f
    • bin/magento cache:flush

    Now you can enter your admin and verify that the changes were successfully applied. In the next chapter of this guide, we'll explore how to add styles to your theme through css and less files in order to change the appearance of the buttons, fonts, colors and other elements of the admin.

Suggested Insights For You

How to create a simple web API in Magento2

How to create a simple web API in Magento2

Webservices are vital mechanisms for two or more systems to communicate, since they allow information to be transferred, procedures to be executed or...

Read More
How to configure the wishlist in Magento

How to configure the wishlist in Magento

E-commerce platforms offer the functionality to store lists of products that interest users. Also, this helps improve the customer experience by...

Read More
Email Templates in Magento

Email Templates in Magento

Sending personalized and professional emails is crucial for maintaining a good relationship with customers and fostering brand loyalty.

Read More

ICX SUBSCRIPTION

Come and be part of the latest specific insights provided by our experts

What’s next?

ARE YOU READY?